First re-upholstery project: There’s a first time for everything…

I’ve always wanted to learn how to re-upholster furniture.  It all started with a sofa that we had when I was a kid that was super(!) comfy, but so ugly you wouldn’t believe.  (As a side note, she tried reupholstering it years later and actually managed to make it even uglier.  It was later relegated to being the “dog sofa,” and just thinking about it makes me sad.)  Nevertheless, an obsession with upholstery was born!

Flash forward 25+ years, and you find the adult Leah learning how to do just that thanks to 3rd Ward in Williamsburg.  This is my first project:

I found this mid-century beauty on the street in Philadelphia about 5 years ago tossed out with someone’s garbage.  It was perfect except for a big rip in the seat, and so I towed it home with me.  I knew that one day I’d redo that vinyl upholstery with something better.  Like they say, one man’s trash is another man’s treasure.

So starting on Saturday, I began the process of deconstruction.  This is what it looked like after I got the back panel off.  The back was basically a piece of cardboard covered with vinyl tacked on with upholstery tacks.

Then I took off the bottom panel.  There were several layers of fabric to get through here funny enough, and one of the great things I found inside was a stamp dating the chair to Oct 1959.  (Pretty cool!)  The springs are serious heavy duty with metal attachments like the kind you have in a mattress…not the normal 8-way hand-tied springs in most upholstery.  (This chair is meant to last forever!)

So this is the chair fully deconstructed.  The legs & arms were attached via two bolts and six flat-head screws.  Less than what I would have thought, but very easy to disassemble once the fabric was off and the frame was exposed.  (The frame is oak I believe by the way which is also interesting…for those other furniture nerds out there.)  The seat springs were covered with a horsehair “cushion” for lack of a better word (which I plan to re-use since it’s perfectly fine…but I will be augmenting it with new foam and batting).  I did keep all the cotton batting too “just in case.”  Also, I plan on re-finishing the arms/legs since the old polyurethane is worn off and looking ratty.

Now the big question is what do I put on it?  I’m debating between several at the moment.  I love those thick wool fabrics in both solid colors and blanket squares too.  Then I’ve found a couple more that are interesting, but nothing concrete yet.  Any suggestions?  Someone suggested leather…but possibly too difficult for my first round of upholstery.  (?!?)

p.s. if you haven’t looked into 3rd ward, i highly suggest it.  They have awesome classes on almost everything.
The Beauty of the Bulb: Light bulb-exposing industrial lighting trend

I love my cfl’s for the sole purpose of saving energy costs, don’t get me wrong…but I hate the light quality that they produce. Therefore I’ve relegated them to use in our reading lights, lamps with patterned shades [to help disguise the light color], and any overhead lights with frosted glass shades.  So with that disclaimer, I launch into a post about bare bulb lighting.  It seems to be everywhere these days, as are edison bulbs.  (Even my mother-in-law has used them in her new guest house!)  And now that we’ve moved into a new apartment with TERRIBLE cheap, brass apartment light fixtures, we’re looking for some relatively inexpensive light fixtures that we can replace these gaudy brass ones with.

Now, I’m sure you’re thinking…why would you replace them?  This isn’t your apartment!  Well…true that.  But we will be living here for quite some time, and when we move we can always put back up the ugly ones and take the new ones with us.  Sooo…with that being said, here are a few of the bulb-exposing fixtures that have caught our eye during our lighting search.

1. Burnside Bulb Pendant from Rejuvenation $112, comes in 12 finishes and different classic cord colors. 2. Blazon Gleam Copper Pendant from Anthropologie $98.  3. Barely There Pendant from Anthropologie $248. 4. Mechanic’s Beacon Pendant – Large Flower from Anthropologie, $148. 5. Defiance Bare Bulb ceiling mount fixture at Schoolhouse Electric, $89. 6.  Clark Flushmount Ceiling Fixture by Wilmette Lighting at Affordable Lamps, $200. It reminds me of this Roost table lamp, but for your ceiling!  7. Clark Modern Pendant Light by Wilmette Lighting at Affordable Lamps, $292.

1.  Wayland Pendant from Schoolhouse Electric, $151 as shown 2.  Porcelain Bare Bulb from any local hardware store, $3.50  3.  Lyon Ceiling Mount fixture from Schoolhouse Electric, $127 as shown 4.  Vintage Pendant Lights from Moon River Chattel, $300

1. Dose of Color Fabric Cord bare bulbs at Anthropologie, $68 (These also look great when used with a lampshade as a hanging pendant over a dining table.  The fabric cord is a great pop of color!)  2.  Roost Berlin Pendant Light from Velocity Art & Design, $163

Soon, you’ll see what we ended up choosing for ourselves and our new apartment!  Hint:  One of these we already owned and brought with us.  A second we chose out of this grouping, and the third wasn’t on here at all.  Haha!  (Everything can’t be bare bulb, y’know!  After all, variety is the spice of life!)

Sofa Hunt: Timothy Oulton’s Reggio

I’ve owned the same sofa since 1998.  It was the first big purchase I made after graduating college, and I got it from Storehouse Furniture.  (Boy did I felt very grown up!)  And even though it’s still a great sofa, it’s definitely seen better days.  Therefore Nick and I have been keeping our eyes open for a style/shape/size that fits our lifestyle as it is today.   And although I’m not entirely sure that this little guy from Timothy Oulton is the perfect one for us and our everyday use, I must say that I absolutely fell in love with it when I saw it today at ABC Carpet & Home in Union Square.  OMG…so perfect in so many ways.

Wanderlust: Jackson Hole

Everytime Nick and I go on vacation, I tell him that THIS place (*insert location*) is definitely the place that I’d like to move.  While we’re there, I inevitably begin to search for real estate listings…  It’s a pattern that I go through that [I’m sure] makes traveling with me both difficult and feel like a broken record.  Nevertheless, on our most recent jaunt to Wyoming, I fell in love all over again with a new place.  With a backyard view like this, who’d ever want to leave?

Not me! Now I just have to figure out how to buy one of those million dollar views!  (It turns out that real estate there is pretty darn expensive.  Try the most expensive in the U.S.  Oh well.  Maybe next vacation spot.)

Kids stuff so adorable that it will make your womb hurt…

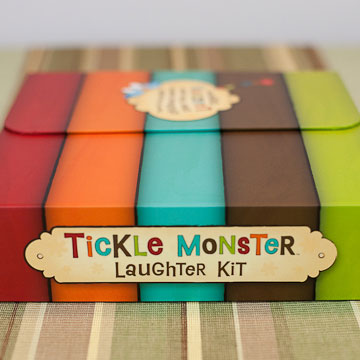
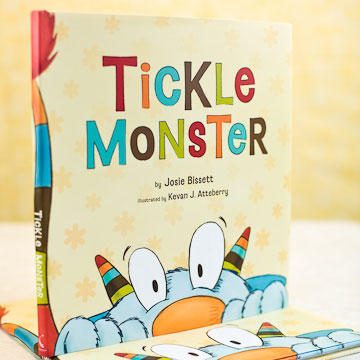
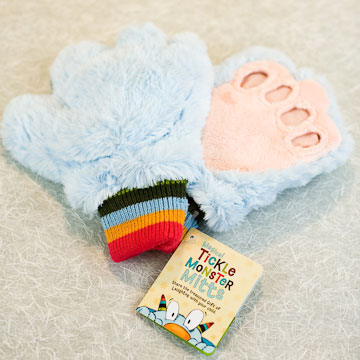
I don’t normally post on children’s stuff, so this is a little off-topic.  However lately the cutest kids items have been popping up onto my screen, and I couldn’t help but point them out to those of you that kids of your own!  These kids gifts really tugged at my heartstrings.  I absolutely must figure out who is getting The Tickle Monster Kit…. (Hmmm?)

The Tickle Monster Kit by Josie Bissett.


The kit comes complete with Tickle Monster Hands!!!

More ridiculous cuteness after the jump. Continue reading “Kids stuff so adorable that it will make your womb hurt…”

I spy: A Colorful Kilim Rug!

(via SFGirlByBay)

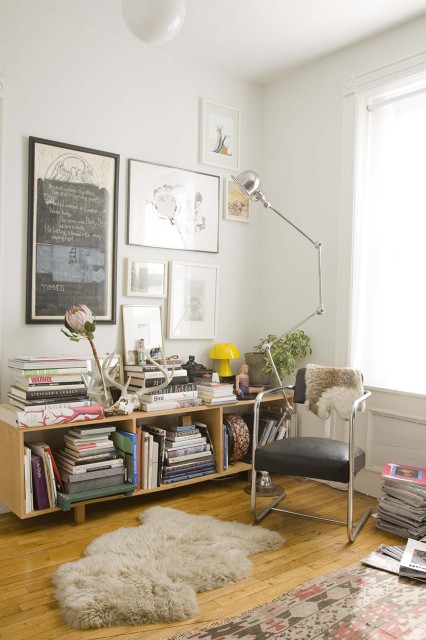
It’s the same rug as the one I have in my dining room!!  Today while cruising through my bloglines feeds, I noticed this post and fell in love with all of the colorful vignettes of Tamar Schechner’s home.  Of course, I also loved the fact that we have the same Ikea Kilim rug!!  (Sadly, they no longer carry it or I’d give you a link.)  At any rate, Tamar has done such an amazing job infusing color and pattern into her home without making it seem overwhelming.   (No easy feat let me tell you!)  Her home also seems like a place where I’d love to kick off my shoes and stay awhile.  I love homes like that!  Anyways, just a few more pics from SFGirlByBay’s post after the jump. Continue reading “I spy: A Colorful Kilim Rug!”